Jumping into Home Assistant: The Installation (and Hiccup) Process
- Matt Zaske
- September 12, 2022
- 6 minutes
About a month ago, I took the plunge.
After considering it for a long time and hearing about some cool stuff folks were doing with home automation, I decided it was time to start my own dabbling adventure. A warning to folks: home automation is a little bit like owning horses. There can be a bunch of expense in the process for little obvious reward.
I settled on the Home Assistant ecosphere based on its ability to be hugely customized and also run in a totally local/non-cloud configuration (not available from the Internet). Home Assistant also supports an incredible number of integrations across all sorts of product lines...and it's open source and "free" to run.
The First Step: Where to Install?
Home Assistant (HA) has really wonderful and detailed documentation to get started and set up through its myriad configurations. One of the questions I needed to answer was how/where to host HA. HA can be installed on almost anything and for a fleeting moment I had considered hosting within Windows on WSL. I ultimately settled on the generic x86-64 option on an old Intel NUC device I had. The old NUC has more than enough horsepower, and only draws about 7w of power.
Once I had the "where" to install settled, it was time to figure out the "how" to install it. I decided to write this post based on the hiccups and struggles I encountered in the "how" part.
Second Step: Laying Down the Boot Image
While the documentation is detailed, I had a hell of a time wrapping my head around the actual steps. Specifically how to get the boot image on the NUC. At first, I followed the instructions to get a boot image onto flash drive, and that was pretty straightforward. Booting the NUC off the flash drive was also pretty trivial, but it performed terribly as I expected. Getting that boot image on the NUC internal storage itself was a challenge I'd not anticipated.
My NUC is new enough to have non-removable internal storage, so I had to do the two-step install process:
- Create an Ubuntu live flash drive and boot it; then
- Use Etcher to write the HA image to the NUC's internal storage.
I'd used Ubuntu live images before, but usually in a crisis/workaround situation and not to actually write/clone a new image. Ubuntu has great documentation for the live bits, and combined with the HA documentation it seemed like it could be pretty trivial to get "right."
Unfortunately, I got stuck.
Weird Behaviors and Failed Attempts
I would boot Ubuntu live and get in without a problem (though due to my cheap USB media it took forever to load). Trying to get Etcher installed was going nowhere, and quickly.
I suspect some of this relates to the "live" installation and the NUC hardware limitations, but I would either have Ubuntu freeze/crash on me, or I could not get the Etcher install to run. There was no in-between, and there were no obvious errors or problems. I had been following this guide for installing Etcher on Linux, and I was just...stuck.
After many reboots and various attempts to get Etcher to install/run, I discovered the problem through some creative Googling.
The Version of libfuse required for Etcher is not included in Ubuntu 22.04
For lots of reasons, this compatibility issue was not obvious...but it turns out the fix is pretty straightforward—install libfuse2:
sudo add-apt-repository universe
sudo apt install libfuse2
Many, many thanks to the comment thread related to AppImage/AppImageKit for identifying the solution.
I don't care about any other compatibility issues, because this is running on a live install, and I only need the older libfuse2 installed long enough to run Etcher to write the proper HA image to the NUC's internal storage.
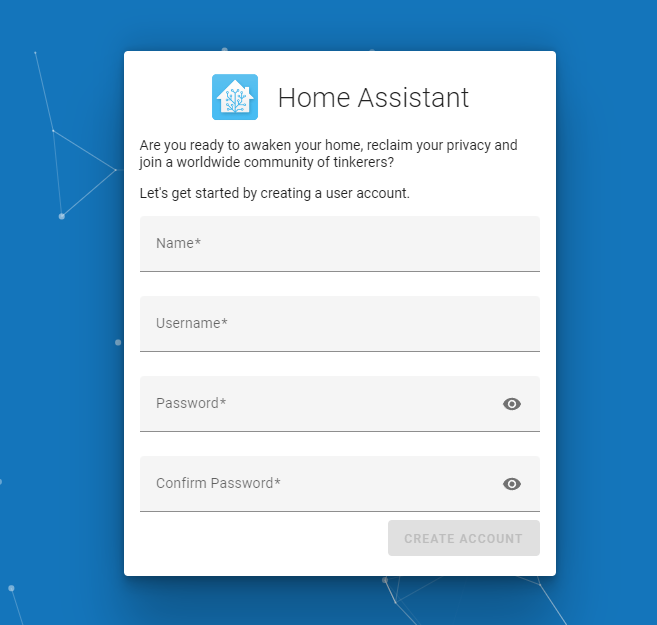
Once this was done, booting into HA for setup was a breeze.
SetUp, Up, and Away!
With Home Assistant on internal storage, I could now set it up following the built-in guide and get started. I didn't have much to play with at first (just a couple of Kasa/TP-Link devices), so admittedly the "day 0" experience was a little underwhelming (once it was installed, that is). However, what I was really looking for was integration with my Tempest weather station.
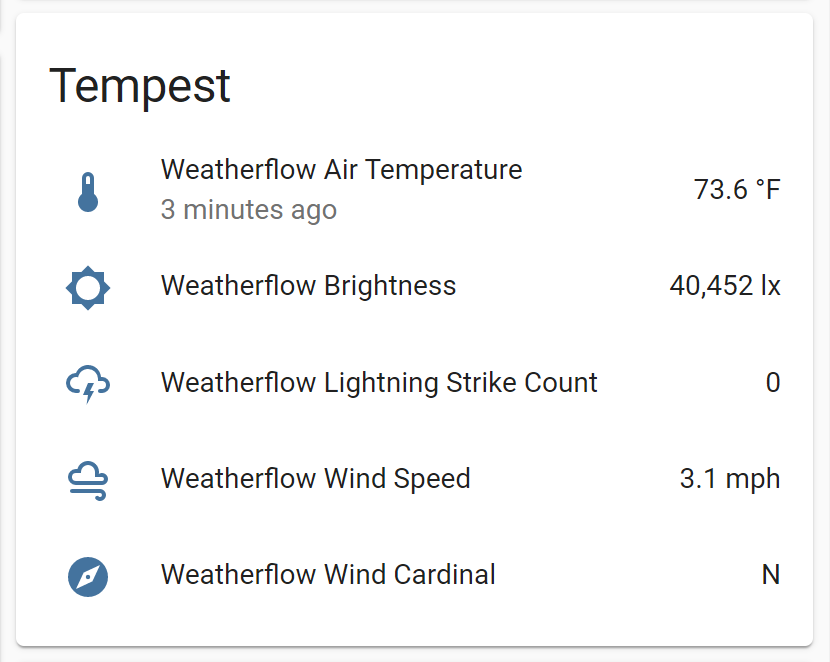
Enter HACS
Home Assistant Community Store (HACS) is a bolt-on integration for Home Assistant to provide access to custom components/integrations. The Tempest integration was super easy to install and configure once I had HACS installed. Pro tip: follow the HACS installation instructions exactly as provided, because skipping any step (or combining them) will not work.
With both HACS and the custom Tempest integration installed and configured, I could make a super-basic HA Dashboard card:
The Door is Open, Come on in!
With the weather station integration, my initial idea was to create some automations based on its data. I intend to write about those adventures (and configurations), along with other fun stuff I've discovered and done in future posts. The short version of the "day 0" experience is that I could (by weather station brightness data) automatically control some lights, which was fun and cool.
While I stumbled a bit getting HA on my NUC box, once it was there it's been working beautifully. The NUC is conveniently tucked away in my low voltage cabinet in the basement where it does its thing. I was a little bummed that the upfront installation was more complicated than I'd expected, but I am also quite happy that the entire system now installed is exceptionally stable and has been a breeze to use with the built-in UI. I actually expected a bit the opposite experience.
As a running total, by the time I got HA running, my total investment ($) in home automation bits and pieces was about $45 for a couple smart lights and switch devices. I don't include the cost of the old NUC or my Tempest station in this figure since they were purchased for entirely different original purposes.
If you've been on the fence about getting into this adventure, give it a shot. Especially if you have a couple of existing smart home things (and/or an old piece of hardware on which to run HA). It's fun to come up with new ideas of how to integrate basic automations!
Recent Posts
Past Speaking Engagements
I was a speaker at MMSMOA, May 3-7, 2026!
I was a speaker at MMS Music City Edition, October 12-15, 2025!

I was a speaker at TCSMUG Autopilot/OSD Day, July 15, 2025!
![]()
I was a speaker at MMSMOA, May 4-8, 2025!
I was a speaker at BrainStorm K20 Wisconsin Dells, March 9-11, 2025!

I was a speaker at MMS Flamingo Edition, October 20-23, 2024!

I was a speaker at TCSMUG OSD Day, July 31, 2024!
![]()
I was a speaker at NWSCUG, July 19, 2024!
![]()
I was a speaker at MMSMOA, May 5-9, 2024!
I was a speaker at BrainStorm K20 Wisconsin Dells, March 10-12, 2024!
I was a speaker at MMS Miami Beach, October 29-November 1, 2023
